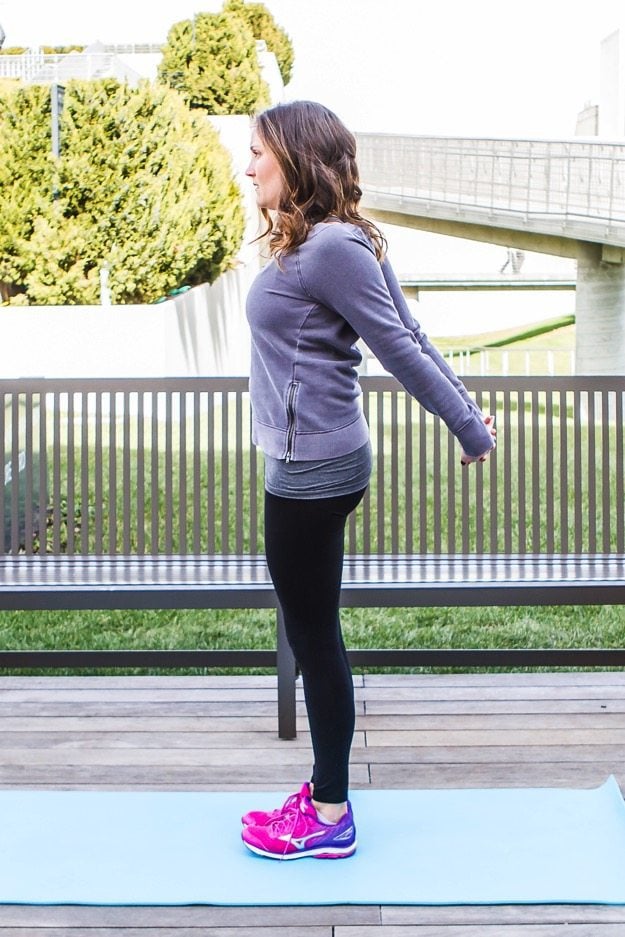
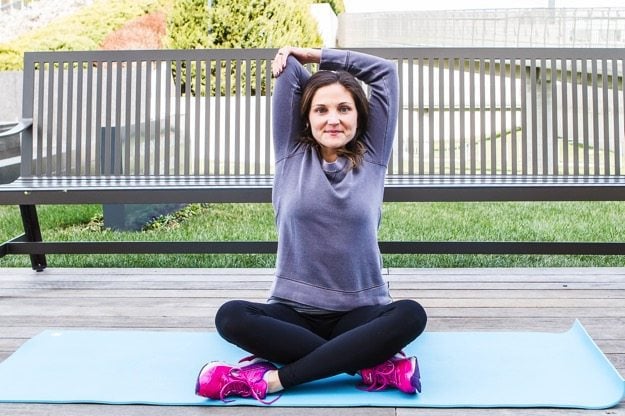
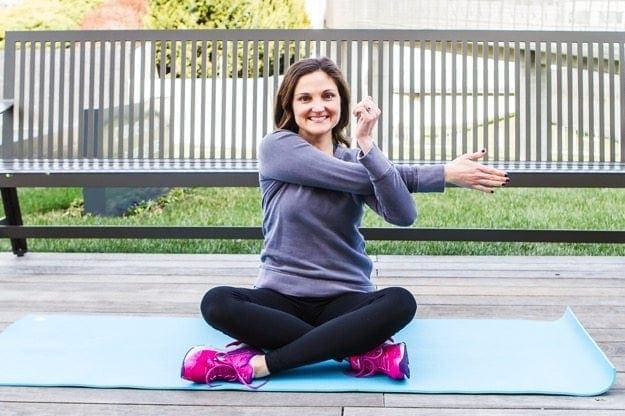
Feeling sore after a tough workout? It's important to give your body plenty of time to recover in between intense sweat sessions. Restorative yoga allows the nervous system to recharge and reset and has been scientifically proven to help lower cortisol levels, mitigating stress and the effect of situations that we feel are out of our control. And less stress equals a faster recovery and improved immune function, so you can keep up with your demand workout regimen. So here are 10 yoga poses you can do after every workout (or on your active recovery days) to help you maximize you time in the gym. (NOTE: Before you begin, you’ll need one bolster, at least two blankets and two blocks for these moves.)

Restorative yoga uses props to ensure that the body is able to deeply relax. Props, gravity and breathing do the work for you; there’s no trying or forcing. It’s an energizing shift from how today’s world operates -- and everyone, especially athletes, needs balance. “Athletes who are coming to practice realize the value of resting the body as an important component of their training regimen,” says Lauren Eckstrom, an experienced restorative yoga teacher in Venice, Calif. “What keeps them coming back is how good they feel. They become more attuned to their bodies. They’re sleeping soundly, there are improvements in digestion, insomnia, athletic performance.” Practicing restorative poses at least once a week is a proactive step in preventing overuse injuries, burnout and fatigue.
Related: The One Thing Your Yoga Practice Might Be Missing

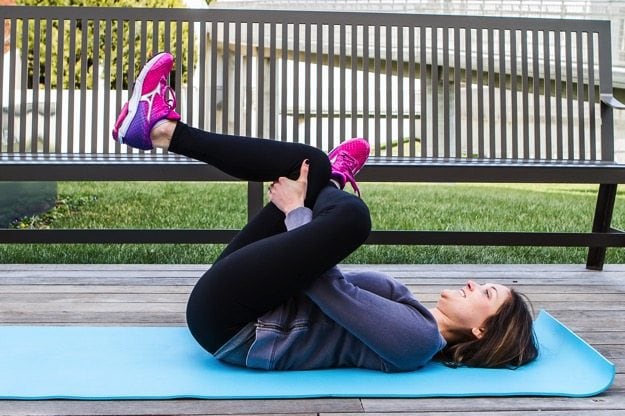
This pose literally means “reverse action.” It helps drain the lymphatic system to carry toxins to the liver and kidneys for excretion, reverses blood flow and can mentally help flip your perspective of stressful issues. HOW TO DO IT: Place a bolster or blanket under your hips. Take a seat with your sit bones as close to the wall as comfortable, lie back with your arms relaxed and out to the side and send your legs up the wall. The more flexible you are through your lower body, the more comfortable you’ll feel closer to the wall. If you’d like, you can place a strap around your thighs for support. Breathe and let go as you relax for five to 10 minutes.

Sinking into this pose is like taking a mini vacation. The external rotation of the hips and support of the upper back to help open the chest and externally rotate the shoulders compensate for the tasks we do each day like driving and sitting at a computer desk. Supporting the knees with blocks allows the inner thighs to open and receive a loving stretch without adding any strain or discomfort. HOW TO DO IT: Lie on a bolster with your sit bones on the floor and a blanket under your head for support. Bring the soles of your feet together and place a block under each knee. Relax your arms out the sides and melt into this pose for five to 10 minutes.
Related: 11 Yoga Poses to Eliminate Stress From Your Day

Twists are an excellent way to cleanse the entire body -- the inner organs, nerves and muscles. They are fantastic for the digestive system, because they can aid in elimination and revitalize your body and mind. HOW TO DO IT: Fold a blanket to support your head, have your bolster and/or blanket to the side. Lie down with arms out to the sides, palms facing up. Bring your left knee in toward your chest, extend your right leg, look to the left or straight up, keep your shoulders on the floor and roll the left hip over to the right. Rest your left knee on the support, breathe and relax for five to 10 minutes on each side.
Related: 11 Yoga Poses to Detoxify Your Body

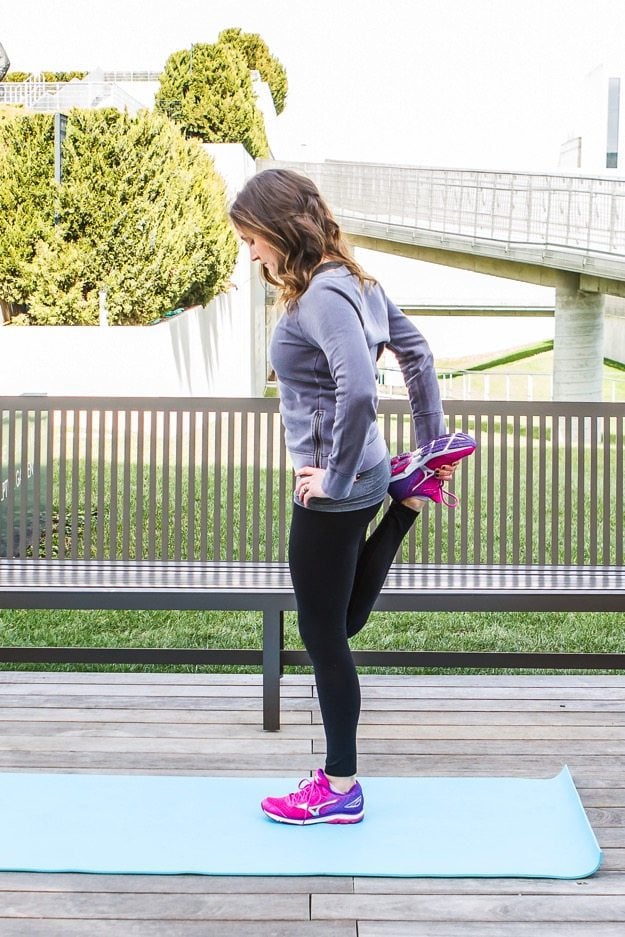
Our hip flexors can get tight due from movements like squatting, running and biking, not to mention daily tasks like sitting and driving. Then, the pelvis rotates forward, which elongates the hamstrings and gluteus maximus beyond their ideal length. This makes the hamstrings and glutes weak. Release the tension and restore your body back to a more balanced state with this pose. HOW TO DO IT: Lie on your back, bend your knees, press your feet into the floor and engage your glutes to lift your hips. Place a block under the bony back part of your pelvis. Relax on top of the block with arms at your sides and breathe for two to five minutes.

This pose allows you to lengthen the hamstrings, release the lower back and lengthen the spine, counteracting compression. Forward folds are known to help alleviate nervous tension, provide relief from headaches and aid in balance of the hormonal system. HOW TO DO IT: Sit on the floor with legs together and outstretched. Place a bolster on top of your thighs. You can also place a folded blanket under your sit bones for support. Fold forward at the hips (not the waist). Let your arms reach for your toes or rest beside you. Rest the crown of your head on the bolster or turn your cheek to one side. Relax into the pose for five to 10 minutes.
Related: 5 Stretches for Tight Hamstrings

This is a deep inner-thigh stretch. Plus, opening up these centers of the body may help alleviate low-back or abdominal pain as well as feelings of irritation or anger. HOW TO DO IT: Sit on the mat with your legs spread wide (about 90 degrees, depending on your flexibility). You can sit on a folded blanket under your sit bones to support your lower back if necessary. Place a bolster in front of you with blankets on top to adjust to your level of flexibility. Hinge forward at the hips. Relax your chest onto the bolster and turn your head to one side. Stay here for five to 10 minutes.
Related: 10 Yoga Moves to Remove Stress and Relax You at Bedtime

Performing this pose can feel like escaping to a secret hideaway that pampers the body and nurtures the soul. Child’s pose eases the nervous system, allows you to relax the front side of the body, breathe into the back body and rest your head, delivering a sense of calm. HOW TO DO IT: Place your bolster on your yoga mat. Fold blankets and stack on top of the bolster if needed. Place your knees to the sides of the bolster. Sit your hips back toward your heels. Lengthen the sternum and fold forward over the bolsters, placing your arms at the sides and resting your cheek on the bolster. Breathe into your back body and relax deeply for as long as you’d like.
Related: 5 Restorative Yoga Poses for Restful Sleep

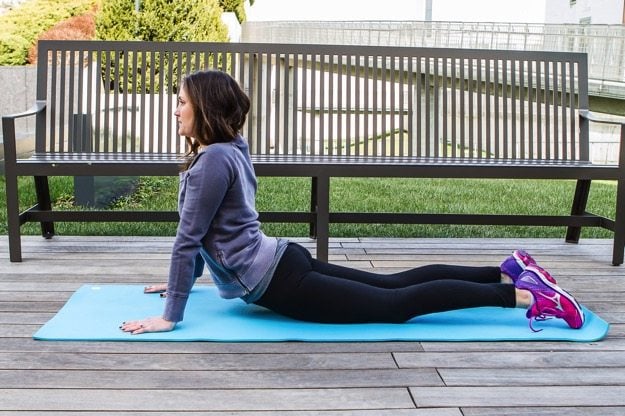
Reclining hero pose is an excellent pose to open up the chest, shoulders and upper back and lengthen the abdomen, hip flexors and quadriceps. Be mindful, though: The reclining version in particular can be too advanced if you have knee issues. HOW TO DO IT: Place your bolster on your mat. Kneel in front of your bolster with your shins hugged in close to the midline of your body, buttocks completely on the floor. Lower your back toward the bolster, placing your elbows on the floor and lying back. Draw your front ribs in and lift your pubis toward your navel to create length in your lower back. Breathe as you sink deeply into the pose for two to five minutes.

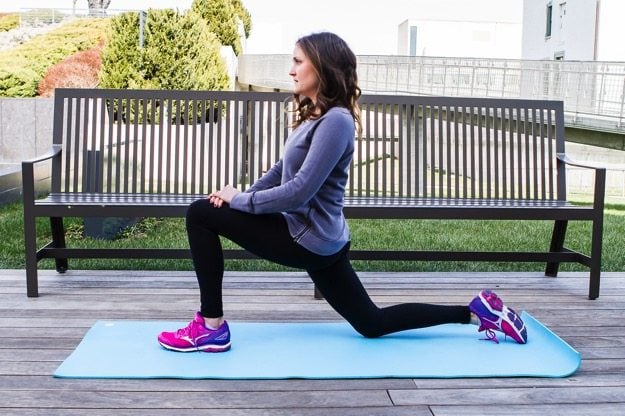
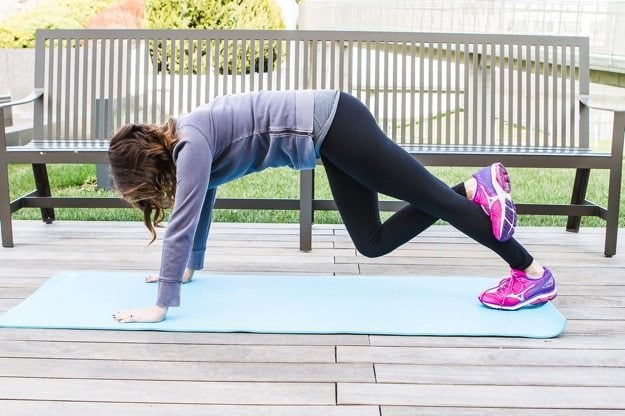
Hip mobility not only feels good, but it may be the key to being free from knee and low-back pain. According to a 2011 study in the Journal of Manual and Manipulative Therapy, about 63 percent of subjects reported improvements in chronic low-back pain after performing hip-mobility exercises. HOW TO DO IT: Place your bolster beneath you while in downward dog. Lunge your right foot in between your hands. Drop the left knee to the floor. Slide your left leg way back. Walk your right foot to your left hand and drop your right knee to the floor. Rest your torso on your bolster with your head turned to one side and your arms resting at your sides. Breathe deeply and remain in the pose for five to 10 minutes before switching sides.
Related: 9 Moves You Can Do Every Day for Better Joint Mobility


Feeling sore after a tough workout? It's important to give your body plenty of time to recover in between intense sweat sessions. Restorative yoga allows the nervous system to recharge and reset and has been scientifically proven to help lower cortisol levels, mitigating stress and the effect of situations that we feel are out of our control. And less stress equals a faster recovery and improved immune function, so you can keep up with your demand workout regimen. So here are 10 yoga poses you can do after every workout (or on your active recovery days) to help you maximize you time in the gym. (NOTE: Before you begin, you’ll need one bolster, at least two blankets and two blocks for these moves.)
Restorative yoga uses props to ensure that the body is able to deeply relax. Props, gravity and breathing do the work for you; there’s no trying or forcing. It’s an energizing shift from how today’s world operates -- and everyone, especially athletes, needs balance. “Athletes who are coming to practice realize the value of resting the body as an important component of their training regimen,” says Lauren Eckstrom, an experienced restorative yoga teacher in Venice, Calif. “What keeps them coming back is how good they feel. They become more attuned to their bodies. They’re sleeping soundly, there are improvements in digestion, insomnia, athletic performance.” Practicing restorative poses at least once a week is a proactive step in preventing overuse injuries, burnout and fatigue.
Related: The One Thing Your Yoga Practice Might Be Missing
This pose literally means “reverse action.” It helps drain the lymphatic system to carry toxins to the liver and kidneys for excretion, reverses blood flow and can mentally help flip your perspective of stressful issues. HOW TO DO IT: Place a bolster or blanket under your hips. Take a seat with your sit bones as close to the wall as comfortable, lie back with your arms relaxed and out to the side and send your legs up the wall. The more flexible you are through your lower body, the more comfortable you’ll feel closer to the wall. If you’d like, you can place a strap around your thighs for support. Breathe and let go as you relax for five to 10 minutes.
Sinking into this pose is like taking a mini vacation. The external rotation of the hips and support of the upper back to help open the chest and externally rotate the shoulders compensate for the tasks we do each day like driving and sitting at a computer desk. Supporting the knees with blocks allows the inner thighs to open and receive a loving stretch without adding any strain or discomfort. HOW TO DO IT: Lie on a bolster with your sit bones on the floor and a blanket under your head for support. Bring the soles of your feet together and place a block under each knee. Relax your arms out the sides and melt into this pose for five to 10 minutes.
Related: 11 Yoga Poses to Eliminate Stress From Your Day
Twists are an excellent way to cleanse the entire body -- the inner organs, nerves and muscles. They are fantastic for the digestive system, because they can aid in elimination and revitalize your body and mind. HOW TO DO IT: Fold a blanket to support your head, have your bolster and/or blanket to the side. Lie down with arms out to the sides, palms facing up. Bring your left knee in toward your chest, extend your right leg, look to the left or straight up, keep your shoulders on the floor and roll the left hip over to the right. Rest your left knee on the support, breathe and relax for five to 10 minutes on each side.
Related: 11 Yoga Poses to Detoxify Your Body
Our hip flexors can get tight due from movements like squatting, running and biking, not to mention daily tasks like sitting and driving. Then, the pelvis rotates forward, which elongates the hamstrings and gluteus maximus beyond their ideal length. This makes the hamstrings and glutes weak. Release the tension and restore your body back to a more balanced state with this pose. HOW TO DO IT: Lie on your back, bend your knees, press your feet into the floor and engage your glutes to lift your hips. Place a block under the bony back part of your pelvis. Relax on top of the block with arms at your sides and breathe for two to five minutes.
This pose allows you to lengthen the hamstrings, release the lower back and lengthen the spine, counteracting compression. Forward folds are known to help alleviate nervous tension, provide relief from headaches and aid in balance of the hormonal system. HOW TO DO IT: Sit on the floor with legs together and outstretched. Place a bolster on top of your thighs. You can also place a folded blanket under your sit bones for support. Fold forward at the hips (not the waist). Let your arms reach for your toes or rest beside you. Rest the crown of your head on the bolster or turn your cheek to one side. Relax into the pose for five to 10 minutes.
Related: 5 Stretches for Tight Hamstrings
This is a deep inner-thigh stretch. Plus, opening up these centers of the body may help alleviate low-back or abdominal pain as well as feelings of irritation or anger. HOW TO DO IT: Sit on the mat with your legs spread wide (about 90 degrees, depending on your flexibility). You can sit on a folded blanket under your sit bones to support your lower back if necessary. Place a bolster in front of you with blankets on top to adjust to your level of flexibility. Hinge forward at the hips. Relax your chest onto the bolster and turn your head to one side. Stay here for five to 10 minutes.
Related: 10 Yoga Moves to Remove Stress and Relax You at Bedtime
Performing this pose can feel like escaping to a secret hideaway that pampers the body and nurtures the soul. Child’s pose eases the nervous system, allows you to relax the front side of the body, breathe into the back body and rest your head, delivering a sense of calm. HOW TO DO IT: Place your bolster on your yoga mat. Fold blankets and stack on top of the bolster if needed. Place your knees to the sides of the bolster. Sit your hips back toward your heels. Lengthen the sternum and fold forward over the bolsters, placing your arms at the sides and resting your cheek on the bolster. Breathe into your back body and relax deeply for as long as you’d like.
Related: 5 Restorative Yoga Poses for Restful Sleep
Reclining hero pose is an excellent pose to open up the chest, shoulders and upper back and lengthen the abdomen, hip flexors and quadriceps. Be mindful, though: The reclining version in particular can be too advanced if you have knee issues. HOW TO DO IT: Place your bolster on your mat. Kneel in front of your bolster with your shins hugged in close to the midline of your body, buttocks completely on the floor. Lower your back toward the bolster, placing your elbows on the floor and lying back. Draw your front ribs in and lift your pubis toward your navel to create length in your lower back. Breathe as you sink deeply into the pose for two to five minutes.
Hip mobility not only feels good, but it may be the key to being free from knee and low-back pain. According to a 2011 study in the Journal of Manual and Manipulative Therapy, about 63 percent of subjects reported improvements in chronic low-back pain after performing hip-mobility exercises. HOW TO DO IT: Place your bolster beneath you while in downward dog. Lunge your right foot in between your hands. Drop the left knee to the floor. Slide your left leg way back. Walk your right foot to your left hand and drop your right knee to the floor. Rest your torso on your bolster with your head turned to one side and your arms resting at your sides. Breathe deeply and remain in the pose for five to 10 minutes before switching sides.
Related: 9 Moves You Can Do Every Day for Better Joint Mobility
Original article and pictures take www.livestrong.com site