среда, 21 июля 2010 г.

7 Easy Best Yoga Poses for Beginners and Back Stretches at Home

7 Easy Best Yoga Poses for Beginners and Back Stretches at Home

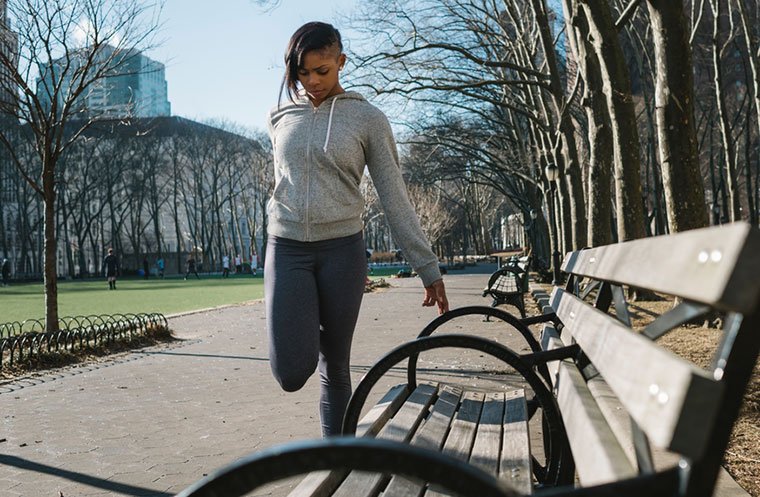
Yoga is the best workout you can start performing because it provides amazing results. It is easy to do and can be done in the comfort of your home as a beginner.


Although it may seem mild, yoga can help you reach a better body fitness and reduce body weight, if you are consistent with your yoga practice. It will also promote relaxation, stress reduction, and will improve the processes of your organism, for a better state of health.


You simply have no reason not to start practicing yoga today. If going to the gym or performing other types of physical activities do not seem to be too attractive in your case. If you never practiced yoga before, it would be recommended to start with some easy yoga poses for beginners first. So you’ll get used to it.


The following 7 basic simple yoga poses will help you get started and can be performed at home whenever you have some spare time.


7 Easy Best Yoga Poses for Beginners and Back Stretches at Home

7 Easy Best Yoga Poses for Beginners At Home


1. The Cat and Cow Pose


The Cat and Cow Pose

This is a basic yoga position that is also used for stretching your back and relieving back pain, especially in the case of people that spend a lot of hours sitting down at a desk. It is one of the easy yoga poses for beginners that will improve your mobility and get rid of tension in your back and middle section.


How To :


  • To perform it, put your hands and knees on the floor, keeping your back in a relaxed position.
  • Inhale deeply and, as you exhale, curve your spine outwards, toward the ceiling, while tucking your chin in your chest.
  • Inhale again and when exhaling, arch your back in the opposite direction, by gently raising your head and looking upward.

2. The Downward Facing Dog


This a simple yoga pose should be performed after the Cat Pose because the previous pose gets the body ready for this particular pose. And this is one of the best daily yoga for beginners.The yoga pose will help you stretch almost your entire body, also allowing you to relax.


How To:


  • Start by standing on your hands and knees, with the fingers of your palms facing forward and the palms positioned just past your shoulder line.
  • Now raise your bottom until your body forms a V shape, making sure your legs and arms are stretched.
  • The feet should be positioned hip-wide and, while supporting your body with your hands, move your chest toward your legs.

3.The Mountain Pose


While it is one of the easy yoga poses for beginners, the Mountain Pose is also considered one of the most basic poses in yoga, so you must learn how to perform it. It will help you learn how to balance your body, aligning it right, while also raising awareness of your entire being.


How To:


  • Stand up straight, having your feet together and your arms hanging next to your body.
  • Make sure your feet stand solidly on the ground because they will take your entire body weight.
  • Make sure to keep your back straight, using a wall at first to make sure you’re doing it right.
  • Your ankles, hips, shoulders, and ears should be all aligned.
  • You can keep your hands around your body or raise them above your head, pushing your shoulder blades against each other, while keeping the palms inward, toward each other.

4. The Child Pose


With the help of this yoga pose, you will manage to relax, finding your moment of peace. Consider this one of the easy yoga poses for beginners made to offer you a break because it helps with relaxing your nervous system.


How To:


  • Start by kneeling, tucking your toes under your bottom. If your knees are giving you a hard time, get into the position gently.
  • Then bend your body forward, reaching your arms in front of you, and lowering your head until your forehead meets the yoga mat.
  • Your palms should lay flat on the ground and your chest should rest comfortably on your thighs.

5. The Warrior I Pose


This position will help tone the muscles of your legs while helping you stretch your arms and legs. It will also help you increase focus and balance. Start it by getting into the Mountain Pose.


How To:


  • Take a deep breath and, as you exhale, put your left leg back so that you end up in a lunge position.
  • The right knee should be above your right ankle.
  • Put your arms up and make sure they align with your ears.
  • Your left foot should be positioned at a 90-degree angle so that your left ankle is perpendicular to your right ankle.
  • Your chest and shoulders should be expanded back and hips kept square as you continue breathing throughout this pose.

Read Next: Top 8 Yoga Poses You Should Start Doing Today


6. The Warrior II Pose


This is another one of the easy yoga poses for beginners, part of the Warrior yoga pose group. It is very similar to the first Warrior pose. Although this time your body is positioned on the side, not forward.


This will work your hip flexor muscles, improving your flexibility.


How To:


  • Start this in the same manner, by taking the Mountain Pose.
  • Take one foot back and make sure it is perpendicular to the foot up front.
  • Raise your arms until they are in the same line with your shoulders, keeping them parallel to the ground.
  • Bend the knee of your front foot until it lies above the ankle, and move your head toward your front stretched arm, looking in that direction.

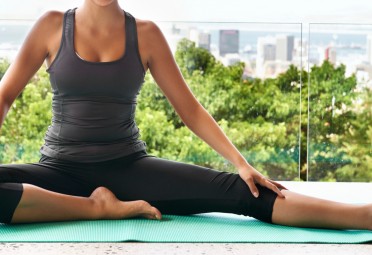
7. The Sukhasna Pose


This is a pose ideal for meditation, helping you get centered and relaxed as well.


How To:


  • Sit down on the yoga mat and cross your legs, tugging your left leg under the right thigh and the right leg under your left thigh.
  • Your spine should stay straight and your hands positioned on your knees.
  • Now gently relax and start breathing in a calm manner.

Yoga is a great way to exercise, tone, and stretch your body, while also reducing tension and stress. So often induced by a busy lifestyle. You can perform yoga at home, on the beach, in a meadow, anywhere you feel like it and anywhere you want, without having to attend yoga classes all the time.


So, are you ready to make a positive change in your life? Then start by performing these easy yoga workout that was specially picked for beginners.


It is your health and well-being at stake, so don’t postpone it any longer. Make yoga a constant presence in your life today and you will immediately feel better and look better if you remain consistent.


Original article and pictures take www.blackdiamondbuzz.com site

понедельник, 12 июля 2010 г.

6 Ways to Boost Post-Workout Recovery

6 Ways to Boost Post-Workout Recovery

Stay active by recovering right. These 6 ways to boost post-workout recovery will help you recover faster, so you can get back at it sooner.


6 Ways to Boost Post-Workout Recovery | Wild Workout Wednesday | Sponsored | Fitness | Workout Tips | Fitness Tips | Healthy Living Tips | Recover Faster

This post is sponsored by NOW Foods.


Welcome to another great Wild Workout Wednesday Link Up where Annmarie from The Fit Foodie Mama, Jen from Pretty Little Grub, and I bring you workout ideas, motivation, inspiration and recipes to try. Join us each week by reading along, linking up and grab the button to proudly display on your blog/in your posts!


grab button for Fitful Focus

<div class=”wild-workout-wednesday-button” style=”width: 200px; margin: 0 auto;”>


<a href=”https://fitfulfocus.com” rel=”nofollow” target=”_blank”>


<img src=” https://fitfulfocus.com/wp-content/uploads/2017/03/WWW-badge.jpg” alt=”grab button for Fitful Focus” width=”200″ height=”200″ />


</a>


Whether you just rocked a solid strength training sesh, went HAM on your HIIT workout or just ran all the miles, one thing remains the same: you have to give your body time to recover. Depending on the intensity of the workout, that could mean a few hours. It could mean a few days, but it doesn’t just mean laying on the couch. Adhere to these 6 ways to boost post-workout recovery and you’ll be feeling refreshed and ready to take on another workout before you know it.


6 Ways to Boost Post-Workout Recovery | Wild Workout Wednesday | Sponsored | Fitness | Workout Tips | Fitness Tips | Healthy Living Tips | Recover Faster

1. Eat Up


Your body needs to refuel after working hard. Something with 3:1 or 4:1 ratio of carbs to protein will give your muscles just what they crave. In need of some inspiration? Check out these 25 things to eat post-workout!


2. Supplement with BCAAs


BCAAs (or Branched Chain Amino Acids) are used as fuel during exercise, so replacing them post-workout is key.* Certain amino acids can’t be made by the human body, so supplementing with them is a great way to boost recovery.* They help promote the normal repair process that takes place after exertion and (bonus!) play an important role in the maintenance of proper immune system function.* I’m currently using NOW Sports BCAA Big 6 Natural Watermelon Powder, which features BCAAs for workout recovery*, betaine to help maintain fluid balance during exercise* and taurine, which can further support endurance*. I take it after my workouts, but you can take it before or during–whatever works for you!


6 Ways to Boost Post-Workout Recovery | Wild Workout Wednesday | Sponsored | Fitness | Workout Tips | Fitness Tips | Healthy Living Tips | Recover Faster | NOW Sports

3. Supplement with ZMA


I take two NOW Sports ZMA Capsules each night before bed, and I swear by them. This is straight from NOW’s website: “ZMA® is a combination of Zinc, Magnesium and Vitamin B-6 designed to maximize absorption and to promote recovery from exercise.* Zinc plays a central role in the regulation of cellular growth and tissue repair, as well as the maintenance of a healthy immune system.* Magnesium is essential for the maintenance of electrolyte balance, energy production and normal neuromuscular function.* Because physical activity can increase the need for these two minerals, ZMA® is the ideal supplement to aid in their replenishment.*”


4. Foam Roll


Admittedly, I haven’t been the best at foam rolling lately, but when I am consistent with my rolling, I notice a huge difference in my recovery time. Foam rolling helps decrease muscle tension, and keeping at it consistently can also reduce risk of injury.


5. Hydrate


Hydration is important for life in general, but it’s especially important if you’ve been working hard and pushing your body. Your muscles, brain and basically everything in that strong body of yours needs water, and the more you sweat out, the more water you need to put back in.


6. Keep moving


Like I mentioned above, recovery doesn’t mean plopping down on the couch. Staying still after a tough workout won’t do your muscles any good. While you shouldn’t be exerting a ton of energy after lifting all the things or running all the miles, you do want to keep moving. Keep standing up and walking throughout the day. Foam roll. Stay active to keep your muscles loosey goosey.


Share your workouts and recovery tips in this week’s Wild Workout Wednesday Link Up (full rules here).


Let’s Chat:

What are your best recovery tips?


This post contains affiliate links.


*These statements have not been evaluated by the Food and Drug Administration. This product is not intended to diagnose, treat, cure or prevent any disease.


Original article and pictures take fitfulfocus.com site

пятница, 9 июля 2010 г.

6 Tips to Optimize the 30-Day Shred Workout's Benefits

6 Tips to Optimize the 30-Day Shred Workout's Benefits

How do you actually make Jillian Michaels' 30-Day Shred Workout slim you down? How do you avoid becoming frustrated at the end with zero results and not conclude that this is just-another-exercise-vid? Here are some of the best tips to maximize this exercise program:


Technically, the metal fat caliper is the most objective tool that can tell us if the exercise program worked for us, but since tape measures and weighing scales are the most available tools around the house (and cheaper, too! metal fat calipers can cost you no less than P10k and plastic ones are around P1,500), these two are already good enough.


30-Day Shred Workout Base Measurement (arm) noting the exact part where I initially measured upper arm circumference (red marker to crease of inner elbow area)

Measure around the biggest part of your upper arms & thighs, the waist (narrowest part of your torso), and the belly area. Make sure you note the exact part where you initially measured (arms and thighs only) so that all future readings are taken most likely on the same areas too.


30-Day Shred Workout Base Measurement (thigh) red marker to base of patella (upper area of kneecap)

THR is target heart rate. Do you ever compute for this? The target heart rate is essential in determining if an exercise protocol is truly effective in improving your cardiovascular system. Every after exercise, you have to check your pulse rate (beats per minute) if it reaches the THR. To compute, you have to note down your Resting Heart Rate (RHR: pulse count in one FULL minute, at rest) and Maximum Heart Rate (HRmax: 220-age).


(i.e., I do 80% of my THR: 80%(190-70)+70). I should end up with a heart rate reading of 166 beats per minute to consider an exercise effective in improving my heart and lungs)


The proper percentage to use will be discussed in tip number 5.


So when is the best time to exercise, really? You can do the 30-Day Shred Workout any time during the day that you are most available and willing to work out. Some are morning persons, feeling that they are able to comply more with exercise if they do it first thing during the day, and some are afternoon buffs, feeling more able to exercise after office or school work.


When is the best time to exercise?

Since there is no reliable and sufficient literature that has proven that the time of the day can affect the body's efficiency in burning calories, it doesn't matter if you do it in the AM or PM; what matters is that you do the routine and you stick to it.


One of the biggest mistakes I did was to start the program, out of sheer excitement, without screening the video first. It is best to practice the exercises involved on the pertinent level (3 Levels, 10 days for each level) you will be doing before starting the workout session.


Screening the 30-Day Shred Workout will help you prevent exercise injuries. Set a time to learn and practice each movement so that when you start your session, you are able to move right without worrying about being able to cope with the trainer's pacing. In this light, you will be able to say that you did Day 1 of each level properly and did not merely spend it on learning how to properly position yourself.


At the start of the video, Jillian tells you to do dynamic stretching to open up the muscles. Doing this solely prior to working out was the second biggest mistake I did. I ended up with severely sore muscles the next day that I had to skip the training for several days.


I emphasize that you properly stretch the following muscle groups: triceps, biceps, pectorals/chest muscles, quads/front thigh muscles, hams/back thigh muscles, and the gastrocs/calves. I contracted a terrible case of DOMS for these muscle groups.


Static Stretching Guide (but should not be limited to these muscle groups)

Properly stretching these muscles means that you have to hold (don't bounce) the stretched position for at least 30 sec, 3 reps each side. Doing static stretching prior to the 30-Day Shred Workout will give you more benefits by letting you exercise consistently and prevent injuries worse than DOMS (think: pulled muscles, sprains, fracture).


Frequency: Jillian suggests that the routine be done 6x/day. This is crazy unless you are on the obese state. Three to four times a week is ideal.


Duration: 40 mins. 10 minutes for static stretching and 30 mins for the 30-Day Shred Workout routine


Intensity: THR: 65% of HRmax (beginners), 70-90% of HRmax (exercising individuals); if you do not achieve your target heart rate, you can repeat doing the entire level (so that's 1 hour of the routine!)


Mode: Interval training + Resistance exercise (this is actually the best way to gain a metabolic boost to bust the fat in the fastest possible time)


More Tips: poundage of weights: I use 2lbs and will progress accordingly; sedentary individuals can start with 1lb


rest periods during the workout: NONE. Jillian is a strict trainer and I love her for that!


On DOMS: Do not push yourself to do the 30-Day Shred Workout while your muscles are aching. You will barely gain any benefit from that painful session (due to limited movement) and you are prone to aggravating your muscle pain. Ice the aching area/s for 10-15mins to impede muscle inflammation and allow faster healing.


No better way to achieve this than to tandem the workout with a balanced diet. Never resort to starvation as you will only deplete yourself substantial energy you need, leaving the body with zero taste to even lift the butt off the couch. Not good.


Most dieters connote dieting to eating seldom and they end up losing all the muscles, retaining all the fat. That's just the saddest thing on earth!


Eat right. Carbs are necessary to keep you energized all throughout the day and especially during training; get your energy from unrefined carbs such as fruits, nuts, whole wheat products, and vegetables. Avoid the bad carbs (refined carbohydrates) because they are the ones that contribute hugely in building the unnecessary fat in the body.


Photo Source

This is such a long post on the 30-Day Shred Workout (for those asking for the video download info, you can contact me.). I have tons of insights that I just couldn't contain and I had to discuss them within these 6 points. I hope you learned a thing or two from the eye-strain and I'm more eager that you start committing to a healthier lifestyle today.


Original article and pictures take herroyalbleakness.blogspot.com site

понедельник, 28 июня 2010 г.

6 Stretches for a Lean, Limber Body

6 Stretches for a Lean, Limber Body

Stretch for Greater Flexibility


Still not getting the results you want from your exercise routine? Blame tight muscles, says Ashley Borden, a celebrity trainer based in Los Angeles. "When one muscle group, like your quads, is stiff, that prevents others, like your glutes, from firing correctly," she explains. End result: compromised performance (and calorie-burning ability), not to mention an increased risk of injury.


Old-school static stretches, where you bend and hold for what seems like an eternity, aren't necessarily the most effective approach to increase your flexibility. Borden swears instead by her "Stretch and Fire" method, which she uses to teach clients like Mandy Moore. Based on a principle called Active-Isolated Technique, it involves contracting one muscle group while stretching the other. This triggers a muscular reflex that will increase your range of motion and deepen the stretch. Best of all, her workout — which targets most women's tightest muscles — takes just minutes a day.


Try these six stretches after your regular cardio or strength workout (aim to do them five times a week). You'll see improvement to your flexibility in as little as two weeks and gains in both your strength and endurance in less than one month.


FI030106GINOW003.jpg
1. Active Pigeon


Target: The Piriformis (a deep gluteal muscle)


  • Begin in a full push-up position, palms aligned under shoulders.
  • Place left knee on the floor near shoulder with left heel by right hip.
  • Lower down to forearms and bring right leg down with the top of the foot on the floor (not shown).
  • Keep chest lifted to the wall in front of you, gazing down.
  • If you're more flexible, bring chest down to floor and extend arms in front of you.
  • Pull navel in toward spine and tighten your pelvic-floor muscles; contract right side of glutes.
  • Curl right toes under while pressing ball of foot into the floor, pushing through your heel.
  • Bend knee to floor and release; do 5 reps total, then switch sides and repeat.

FI030106GINOW007.jpg


2. C-Curve


Target: Lower Back


  • Sit on floor with knees bent, feet on floor about 12 inches in front of butt.
  • Interlace fingers behind hamstrings, pointing elbows out to sides.
  • Round back, tightening pelvic floor and pulling navel in toward spine; focus on your belly button with jaw pulled in. Inhale through your nose.
  • As you exhale, draw navel in even tighter and lift left leg, pushing left heel toward wall in front of you while pulling back with pinkie toe; at the same time, push down on right foot (not shown).
  • Return to start and repeat.
  • Do 5 reps; switch sides and repeat.

FI030106GINOW002.jpg
3. Modified Cobra


Target: Abdominals


  • Lie facedown on the floor with thumbs directly under shoulders, legs extended with the tops of your feet on the floor.
  • Tighten your pelvic floor, and tuck hips downward as you squeeze your glutes.
  • Press shoulders down and away from ears.
  • Push through your thumbs and index fingers as you raise your chest toward the wall in front of you.
  • Relax and repeat.
  • Do 5 reps total.

FI030106GINOW004.jpg
4. Hamstring Stretch Series


Target: Hamstrings


  • Place a small folded towel behind your head and lie faceup on the floor with legs extended and feet flexed.
  • Bend right knee to chest and interlace fingers behind hamstrings as close to your groin as possible; gaze at your chest and keep your chin down, neck long (not shown).
  • Tighten the muscles of your pelvic floor and extend leg, pushing through the heel and contracting quads.
  • Return to start and repeat; do 5 reps.
  • Repeat, turning thigh outward (heel points in), for 5 reps.
  • Relax and repeat, turning thigh inward (heel points out, toes point in), for 5 reps.
  • Switch legs; repeat series for a total of 15 reps on each leg.

FI030106GINOW006.jpg
5. Split Squat


Target: Quads, Calves


  • Stand with feet hip-width apart.
  • Step right foot about 12 inches in front.
  • Curl toes of your left leg under; keep weight equal between both feet. Interlace fingers, placing hands under ribs; press shoulders down away from ears.
  • Tighten the muscles of your pelvic floor; tuck your pelvis under and squeeze glutes.
  • Slowly bend both knees, coming down in 3 counts; feel the stretch along the left quad.
  • Press into floor to rise back to start in 3 counts.
  • Do 5 reps; switch legs and repeat.

FI030106GINOW005.jpg
6. Quadrupeds


Target: Shoulders


  • Kneel on all fours with wrists aligned under shoulders and knees under hips, toes curled into floor (not shown).
  • Bring your forehead toward the floor and slide the pinkie edge of your left hand along the floor in front of you (keep your right palm flat on the floor).
  • Press shoulders down away from your ears and squeeze your glutes.
  • Return to starting position by pushing down on your right palm and sliding your left hand back toward your shoulders.
  • Do 5 reps; switch sides and repeat.

The Best Time to Stretch


Question: "What's the best time to stretch — before or after a workout?"


Answer: "Some studies have shown that stretching right before exercise can actually hamper performance," says Mike Bracko, EdD, director of the Institute for Hockey Research in Calgary, Alberta, and a fellow of the American College of Sports Medicine.


One Theory: When you stretch, protein filaments in the muscles expand, then stay elongated for a short time, making the muscle weaker for about 10 to 15 minutes. Better? Warm up to increase blood flow, then stretch post-workout, when your muscles are more flexible.


The Forgotten Area You Must Work


You've probably heard that Kegel exercises will strengthen your pelvic floor after pregnancy and ramp up your sex life anytime. But these moves (developed by Arnold Kegel, MD, in the late 1940s) are also crucial to building a firm foundation for any movement, says trainer Ashley Borden.


"It's vital to strengthen both the muscles of your pelvic floor and your deep abdominals," she notes. "These muscles work together to create a solid base on which everything else can build."


Build Up Your Pelvic Floor and Deep Abdominals


  • To engage the area, think about stopping the flow of urine midstream.
  • Keep the muscles contracted while pulling your navel in toward your spine.
  • Hold this position during each stretch.

Original article and pictures take www.fitnessmagazine.com site

среда, 16 июня 2010 г.

6 stretches every runner should do before and after a workout

6 stretches every runner should do before and after a workout
Photo: Stocksy/Mauro Grigollo

Try these stretches before a workout
Photo: Stocksy/GIC

Before running


Hip circles: Before you hit the ground running, do Warner’s favorite pre-run stretch. Start with your feet wide, toes forward, and your hands on hips. Now circle your hips four or five times clockwise and counterclockwise.


Deep squat to rise: Karena Dawn and Katrina Scott, the founders of Tone It Up, recommend this stretch for warming up your lower back, hamstrings, quads, and hips. Begin in a deep squat with your feet wider than shoulder-width apart and your elbows pressing your inner thighs. Lower your hands to the ground and straighten your legs. One vertebrae at a time, raise to a standing position. Then open your arms out to the sides and raise them to meet above your head. Lower your arms back down and bring your palms to your heart center before lowering into a squat. Repeat five times.


Dynamic runners’ lunges: Rachel Mariotti, a precision running instructor at Equinox, recommends doing this move to warm up your hamstrings and stretch your hips. Start standing, with your feet shoulder-width apart. Step backward with one leg, then drop into a lunge, bending at both knees to form 90-degree angles with your legs. Stand back up, and repeat five times on each side.


Here are some stretches to do after running
Photo: Stocksy/Bonninstudio

Calf and hamstring stretch: Mariotti recommends this two-in-one stretch. Put the ball of your foot on a curb (with your heel on the ground) or the edge of a treadmill so your heel hangs off and you feel a stretch in your calf. Reach down to your toes while you stretch to get a good hamstring stretch as well, then repeat on the other side.


Foam roller: Consider this piece of equipment your post-run BFF. Mariotti recommends a vibrating foam roller, but a static one will work as well. Start by sitting on the roller and move it slowly down each leg to loosen any tension that was built up during your run. This’ll release tightness in your hamstrings, calves, and quads.


Figure four: Warner says not to forget to stretch your piriformis, a muscle in your glute region, because if it’s tight, it can lead to pain in your lower back, hamstrings, or nerves. While sitting on a bench or chair, cross your right leg over your left so the ankle rests on the opposite knee. Press gently on the bent right knee for a deeper stretch. Repeat a few times on each side.


Be the smartest runner on the block! Here’s why a sunset run can be a real game-changer, plus the running myths you should never fall for.


Photo: Stocksy/Mauro Grigollo

Try these stretches before a workout
Photo: Stocksy/GIC

Here are some stretches to do after running
Photo: Stocksy/Bonninstudio

Calf and hamstring stretch: Mariotti recommends this two-in-one stretch. Put the ball of your foot on a curb (with your heel on the ground) or the edge of a treadmill so your heel hangs off and you feel a stretch in your calf. Reach down to your toes while you stretch to get a good hamstring stretch as well, then repeat on the other side.


Foam roller: Consider this piece of equipment your post-run BFF. Mariotti recommends a vibrating foam roller, but a static one will work as well. Start by sitting on the roller and move it slowly down each leg to loosen any tension that was built up during your run. This’ll release tightness in your hamstrings, calves, and quads.


Figure four: Warner says not to forget to stretch your piriformis, a muscle in your glute region, because if it’s tight, it can lead to pain in your lower back, hamstrings, or nerves. While sitting on a bench or chair, cross your right leg over your left so the ankle rests on the opposite knee. Press gently on the bent right knee for a deeper stretch. Repeat a few times on each side.


Be the smartest runner on the block! Here’s why a sunset run can be a real game-changer, plus the running myths you should never fall for.


Original article and pictures take www.wellandgood.com site

вторник, 8 июня 2010 г.

6 Simple Moves to Eliminate Knee Pain for Good

6 Simple Moves to Eliminate Knee Pain for Good
The 6 Yoga Poses to Relieve Back Pain ASAP

Feeling weak in the knees is only a good thing when it’s over your latest Tinder date. Experiencing joint pain is an entirely different sensation—and one that’s not quite so magical.


Joint pain affects one in five Americans and is one of the leading causes of disability in the U.S. Along with leg, neck, and back pain, knee pain tops the list of problem areas, according to James Rippe, M.D., a cardiologist and joint pain specialist. And we're not getting better: A 2013 study reported a 162 percent increase in knee replacements over the last 20 years in people 65 and older .


So how do you know if you're at risk? Factors like inactivity, carrying too much bodyweight, poor posture, improperly treated injuries, and insufficient nourishment can all contribute to knee pain, Rippe says. Luckily, by taking better care of your knees throughout your life, starting as early as your thirties, you can strengthen joints and potentially save yourself from years of daily pain and discomfort.


What You Can Do Now


One of the best things you can do for knee health is simply maintaining an active lifestyle. “Your joints thrive on movement,” Rippe says. “Always try to remember that some activity is better than no activity.” Rippe recommends low-impact activities, like swimming, brisk walking, or cycling, and considering taking health supplements that provide glucosamine and chondroitin to strengthen and lubricate knees.


On the flip side, too much movement can be hard on your joints. So if you're one of those people who just can’t quit their HIIT habit or long-distance runs, there are some simple moves and stretches you can try that will help alleviate pain.


Since multiple muscles overlap the knee joint—including your calf, thigh, hamstrings, quadriceps, gastrocnemius, and soleus—and work together to flex, extend, and stabilize the knee, the exact source of pain isn’t always obvious. “This means you want to think about stretching all the tissues around the knees,” says Lauren Williams, a certified personal trainer and head coach at New York City’s athletic-based training studio Tone House.


Here, Williams shares six of the best (and simplest) moves that target all those muscle groups. Try to do these stretches after every workout to keep your knees healthy now and in the future.


Wall Calf Stretch

Calf muscles often get neglected during our stretching efforts. However, for those who run, do high-impact workouts, or spend a lot of time on their feet, calf stretches are very necessary, Williams says. Calves can get extremely tight from impact and need to be stretched to relieve any pain that might travel up the knee.


Find a wall you can lean against. Facing the wall, flex your right foot and position your heel right where the floor meets the vertical surface. Your toes should be elevated, while your heel remains on the floor. Keeping your heel on the ground and your leg as straight as possible, lean toward your front leg, holding the stretch at its deepest point. Lean in for five seconds at a time before releasing, working to deepen the stretch. Repeat the same stretch with your left leg. Aim for 10 to 15 reps on each leg—or more, if you’re still experiencing tightness.


Calf Smash

This move allows you to work out tension in both your calf and your hamstring, Williams says.


Sit on the ground and pull your right foot close to your butt so your knee is bent. Wedge a lacrosse ball (or yoga/massage ball) below your right knee, sandwiching it between your calf and hamstring. Create a “compression force” by pulling your shin toward you, then rotate your foot in alternating circular movements to help create space in your knee joint. Continue until you feel tightness in these areas being relieved, then switch legs.


Half Kneel Hip and Quad Stretch

This stretch not only feels amazing, but it also works double-duty for your hip and quad muscles, Williams explains.


Kneel on one knee (feel free to put down a towel or mat) with your other foot planted flat on the ground in front of you. Make close to a 90-degree angle with both of your legs. Lean forward toward your front leg, stretching the front of your hip downward. Next, grab the ankle of your leg planted on the ground, and pull it toward your rear for a deep hamstring and hip stretch down the front leg, all the way to your knee. Move in and out of this stretch for 10 to 15 reps or more, depending on your level of tightness.


Quad Foam Roller Stretch

Stretching your quads is vital, as they get adaptively short from all the sitting most of us do every day and are often under constant tension. To get this large muscle group back to functioning at its best, Williams suggests using a foam roller.


Lie facedown and with a foam roller under your right leg, right under your quad. Put the majority of your bodyweight on your leg, and roll slowly. Instead of simply rolling up and down, roll your leg from side to side too, focusing pressure on the tighter spots of your muscles. Switch legs. Continue rolling until this feeling is no longer painful. If that’s impossible (as it might be for some runners!), do it for at least five minutes.


Wall Hamstring Stretch

Our hamstring muscles affect the knee more than we think and can be the source of discomfort or pain.


Lie faceup with your left leg flat on the ground, foot flexed. Take your right leg and prop it up on a wall or table, or use a resistance band. This stretch should radiate down the back of your leg, beginning in your knee. Once you find the deepest point of the stretch, alternate in five-second sequences between contracting and relaxing the foot of your right leg. If you have greater flexibility, hold the ankle of your right leg and pull it toward you. Aim for 10 to 15 rounds of five-second holds, and continue if you still feel tight. Repeat with your left leg.


Straight Leg Raise

Easy strengthening exercises, like leg raises, put little to no strain on your knee but also activate and strengthen quadriceps.


Lie faceup with one knee bent and the other leg the ground in front of you. Lift your straight leg up approximately one foot, rotating your leg outward (the entire leg rotates outward, so toes point on a diagonal instead of straight up to the ceiling). Do 3 sets of 10 to 15 reps, alternating legs. As you get stronger, add ankle weights up to 10 pounds.


Original article and pictures take greatist.com site

вторник, 25 мая 2010 г.

6 Post-Workout Stretches to Combat Knee Pain

6 Post-Workout Stretches to Combat Knee Pain

Share it:


6 Post-Workout Stretches to Combat Knee Pain

Feeling weak in the knees is only a good thing when it’s over your latest Tinder date. Experiencing joint pain is an entirely different sensation—and one that’s not quite so magical.


Joint pain affects one in five Americans and is one of the leading causes of disability in the U.S. Along with leg, neck, and back pain, knee pain tops the list of problem areas, according to James Rippe, M.D., a cardiologist and joint pain specialist. And we’re not getting better: A 2013 study reported a 162 percent increase in knee replacements over the last 20 years in people 65 and older.


So how do you know if you’re at risk? Factors like inactivity, carrying too much bodyweight, poor posture, improperly treated injuries, and insufficient nourishment can all contribute to knee pain, Rippe says. Luckily, by taking better care of your knees throughout your life, starting as early as your thirties, you can strengthen joints and potentially save yourself from years of daily pain and discomfort.


What You Can Do Now


One of the best things you can do for knee health is simply maintaining an active lifestyle. “Your joints thrive on movement,” Rippe says. “Always try to remember that some activity is better than no activity.” Rippe recommends low-impact activities, like swimming, brisk walking, or cycling, and considering taking health supplements that provide glucosamine and chondroitin to strengthen and lubricate knees.


On the flip side, too much movement can be hard on your joints. So if you’re one of those people who just can’t quit their HIIT habit or long-distance runs, there are some simple moves and stretches you can try that will help alleviate pain.


Since multiple muscles overlap the knee joint—including your calf, thigh, hamstrings, quadriceps, gastrocnemius, and soleus—and work together to flex, extend, and stabilize the knee, the exact source of pain isn’t always obvious. “This means you want to think about stretching all the tissues around the knees,” says Lauren Williams, a certified personal trainer and head coach at New York City’s athletic-based training studio Tone House.


Here, Williams shares six of the best (and simplest) moves that target all those muscle groups. Try to do these stretches after every workout to keep your knees healthy now and in the future.


1. Wall Calf Stretch


wall calf stretch

Calf muscles often get neglected during our stretching efforts. However, for those who run, do high-impact workouts, or spend a lot of time on their feet, calf stretches are very necessary, Williams says. Calves can get extremely tight from impact and need to be stretched to relieve any pain that might travel up the knee.


Find a wall you can lean against. Facing the wall, flex your right foot and position your heel right where the floor meets the vertical surface. Your toes should be elevated, while your heel remains on the floor. Keeping your heel on the ground and your leg as straight as possible, lean toward your front leg, holding the stretch at its deepest point. Lean in for five seconds at a time before releasing, working to deepen the stretch. Repeat the same stretch with your left leg. Aim for 10 to 15 reps on each leg—or more, if you’re still experiencing tightness.


2. Calf Smash With Lacrosse Ball


calf smash

This move allows you to work out tension in both your calf and your hamstring, Williams says.


Sit on the ground and pull your right foot close to your butt so your knee is bent. Wedge a lacrosse ball (or yoga/massage ball) below your right knee, sandwiching it between your calf and hamstring. Create a “compression force” by pulling your shin toward you, then rotate your foot in alternating circular movements to help create space in your knee joint. Continue until you feel tightness in these areas being relieved, then switch legs.


3. Half-Kneel Hip and Quad Stretch


hip and quad stretch

This stretch not only feels amazing, but it also works double-duty for your hip and quad muscles, Williams explains.


Kneel on one knee (feel free to put down a towel or mat) with your other foot planted flat on the ground in front of you. Make close to a 90-degree angle with both of your legs. Lean forward toward your front leg, stretching the front of your hip downward. Next, grab the ankle of your leg planted on the ground, and pull it toward your rear for a deep hamstring and hip stretch down the front leg, all the way to your knee. Move in and out of this stretch for 10 to 15 reps or more, depending on your level of tightness.


4. Quad Foam Roller Stretch


quad foam roller move

Stretching your quads is vital, as they get adaptively short from all the sitting most of us do every day and are often under constant tension. To get this large muscle group back to functioning at its best, Williams suggests using a foam roller.


Lie facedown and with a foam roller under your right leg, right under your quad. Put the majority of your bodyweight on your leg, and roll slowly. Instead of simply rolling up and down, roll your leg from side to side too, focusing pressure on the tighter spots of your muscles. Switch legs. Continue rolling until this feeling is no longer painful. If that’s impossible (as it might be for some runners!), do it for at least five minutes.


5. Wall Hamstring Stretch


Our hamstring muscles affect the knee more than we think and can be the source of discomfort or pain.


Lie faceup with your left leg flat on the ground, foot flexed. Take your right leg and prop it up on a wall or table, or use a resistance band. This stretch should radiate down the back of your leg, beginning in your knee. Once you find the deepest point of the stretch, alternate in five-second sequences between contracting and relaxing the foot of your right leg. If you have greater flexibility, hold the ankle of your right leg and pull it toward you. Aim for 10 to 15 rounds of five-second holds, and continue if you still feel tight. Repeat with your left leg.


6. Straight-Leg Raise


straight-leg raise

Easy strengthening exercises, like leg raises, put little to no strain on your knee but also activate and strengthen quadriceps.


Lie faceup with one knee bent and the other leg the ground in front of you. Lift your straight leg up approximately one foot, rotating your leg outward (the entire leg rotates outward, so toes point on a diagonal instead of straight up to the ceiling). Do 3 sets of 10 to 15 reps, alternating legs. As you get stronger, add ankle weights up to 10 pounds.


Sponsored


Skincare Today


ELLEN Opens Up About Big Changes. Confirms She Is Moving On


Many knew what Ellen's plan was, but no one expected it to leak like this... (You will not believe what she did)


Learn More


Report ad


Sponsored


Sponsored


Original article and pictures take 1y2u3hx8yml32svgcf0087imj-wpengine.netdna-ssl.com site