вторник, 3 февраля 2009 г.

12 Powerful Yoga Poses for Every Athlete

12 Powerful Yoga Poses for Every Athlete

A 240-pound linebacker in a yoga class may garner a few quizzical stares, but he and his coach know the secret: The type of strength and flexibility gained by a regular yoga practice helps him perform better on the football field. In addition, practicing yoga can aid recovery by helping to reduce muscle soreness during times of intense training, according to a study published in the Journal of Strength and Conditioning Research in November 2004. Whether you’re a tennis pro, golf guru, soccer star, track champion or a slalom skier, up your game by incorporating the following poses into your training regimen.


1. Pigeon Pose

Fitness instructor Sue Hollingshead rates Pigeon pose as one of the best for runners because it lengthens the hip flexors, psoas muscles, gluteals, piriformis, lower-back and groin muscles, all of which can become tight with repeatedly pounding the pavement. HOW TO DO IT: Begin on your hands and knees. Draw your right knee toward your right hand. Rotate your right hip outward as you bring your right foot to your left hand and extend your left leg back. Lower your right shin and hip to the floor. Gradually extend your left leg back to find more length in the pose. Keep your hips even and put a block under your right hip for support if it doesn’t come all the way to the floor. Never force yourself to stretch further than your hips will allow, but let gravity pull your body weight down into the pose. Hold the pose for 30 to 60 seconds then switch sides.


Related: How to Loosen Hamstrings With Yoga


2. Triangle Pose

“Every single athlete in the world can benefit from this posture,” says yoga therapist Daniel Hickman. Triangle pose helps lengthen the side body, which Hickman says is especially beneficial for athletes whose sports involve repetitive one-sided motions or core rotations, such as baseball, tennis, ultimate Frisbee and golf. HOW TO DO IT: From standing, take a big step back with just your right foot -- about four feet, depending on your height. Turn your back/right foot 90 degrees out and keep your front/left foot pointing forward, aligning your front heel with the arch of your back foot. Raise your arms perpendicular to the floor, slide your torso forward and tilt your arms, resting your left hand on your left shin. Keep your quadriceps contracted and your spine elongated. Hold the position for 30 to 60 seconds and switch sides.


Related: The Yoga Solution With Tara Stiles


3. Camel Pose

Cyclists spend a lot of time in a hunched position, which can shorten the chest muscles. Sitting on a bike for hours a day also leads to tight hip flexors and abdominal muscles. Camel pose is a big stretch for the entire front of the body, helping to improve posture and counteract the effects of cycling on your upper body. HOW TO DO IT: Kneel with your knees hip-distance apart. Press your shins and the tops of your feet into the floor. Place your hands on your lower back with the bases of your palms on your buttocks and your fingers pointing down. Press through your pelvis and begin to lean back, extending the spine. Keep your neck in a neutral position. Most people can get a deep stretch here. To take it deeper, reach your hands back to grasp the tops of your feet.


Related: Get Fit With the 30-Day Yoga Challenge


4. Broken Toe Pose

The soles of the feet take a beating in many sports, but most athletes devote very little time to stretching them. Although it sounds unappealing, regularly including Broken Toe pose in your practice can help lengthen the thick plantar muscles on the bottoms of your feet, combating plantar fasciitis, which occurs when those muscles become contracted and inflamed. HOW TO DO IT: Start kneeling on the floor with your shins parallel to each other. Tuck your toes under so that your heels are pointing up and sit back onto your heels. “Starting on the knees with both feet can be really excruciating for some people,” says yoga therapist Daniel Hickman. Instead, he recommends coming onto all fours and extending one leg at a time behind you, tucking the toes of your foot and pressing them all into the floor simultaneously.


Related: Get Fit on the Water With Paddleboard Yoga


5. Thread the Needle

If you have tight hips and you can’t yet get into Pigeon pose, you can do Thread the Needle instead. Because it’s supine, or done lying on your back, it’s a relaxing way to unwind after a strenuous training session. HOW TO DO IT: To begin, lie on your back with your knees bent and your feet flat on the floor hip-distance apart. Lift your right foot and bring it across your left thigh just below your knee. Let your right knee fall out to the side so your right ankle is resting on your left thigh. Clasp your hands around the back of your left thigh and gently pull that leg toward your chest, keeping your back flat on the ground. Hold for 30 to 60 seconds, then switch sides.


Related: Yoga Postures to Help Bad Knees


6. Standing Forward Bend

Tight hamstrings are common among athletes in sports that require short, intense sprints and rapid acceleration, such as tennis, baseball and hockey. A simple forward bend can help gradually lengthen these muscles. Personal trainer and yoga teacher Pamella Inveen says that many athletes have trouble achieving the straight-legged version of this pose. Instead, she recommends bending your knees deeply. HOW TO DO IT: Start with your feet hip-width apart then pivot from the hips as you bend forward. Try to get your ribs to touch your thighs, but don’t force anything. Be careful not to round your back forward. Either rest your hands on the floor or put your hands on blocks or on your shins. Lift your hips toward the ceiling to try to straighten your legs without allowing your abdomen to come off your thighs. Make sure you keep a slight bend in your knees and do not lock them.


Related: What Are the Benefits of Vinyasa Yoga?


7. Cobra Pose

Athletes in defense sports -- such as mixed martial arts, basketball and football -- will benefit from Cobra pose, which opens up the front of your body, says yoga therapist Daniel Hickman. “There’s a lot of contraction in the body…which can be overemphasized in practice, but also applied and reinforced in competition,” he says. This can lead to overly tight chest and abdominal muscles and postural imbalance. This pose is a great way to counteract that. HOW TO DO IT: To perform the pose, lie on your belly with the tops of your feet on the floor. Place your hands on the ground under your shoulders and hug your elbows to your sides. Press through your hands and straighten your arms almost all the way (keep a slight bend in your elbows), lifting your torso off the ground. Stop before your pubic bone lifts off the floor. Keep your tailbone slightly tucked under and your thighs firm.


Related: 10 Poses That a Yoga Beginner Should Know


8. Low Lunge

A go-to stretch for runners and any athlete whose sport requires running or sprinting, the Low Lunge targets all of the muscles in your legs, especially your hamstrings, quadriceps and hip flexors. HOW TO DO IT: To get into the pose, from standing, take a big step back with your right foot and bend your left knee to 90 degrees. Keep your left knee directly over your left foot. Drop your back knee to the ground and either leave your toes curled or place the top of your foot on the mat. To go deeper, inch your back knee back and lower your hips toward the ground. Keep your torso upright or place your fingertips on the ground on either side of your front foot. Hold the pose for 30 to 60 seconds, then switch sides.


Related: 5 Yoga Poses to Firm the Butt


9. Cow Face Pose

Racquet sport athletes will benefit from the shoulder-opening power of Cow Face pose. The gluteals, IT band and quadriceps also lengthen and stretch. HOW TO DO IT: Get started by sitting on the floor with your legs straight out in front of you. Then cross your right knee over your left knee so that your left foot is beside your right hip and your right foot is beside your left hip. Next, bring your right hand behind your lower back with your palm facing out. Bend your left elbow toward the ceiling and place your left palm in between your shoulder blades. Inch your right hand up your back and try to clasp your hands. To modify the pose, extend your left leg and bring your right ankle to the top of the left thigh. Close the gap between your hands using a strap. Hold the pose for 30 to 60 seconds before switching sides.


Related: How to Get Energized in the Morning Without Coffee


10. Plank Pose

Yoga isn’t just about stretching, and any athlete can benefit from moves that help build stability in the core -- the abdominals, hips and mid-back. Yoga teacher Pamella Inveen says that a strong core is especially important for golf, tennis and baseball athletes who need to use their core to power rotation through their mid and upper body. HOW TO DO IT: Start by getting into push-up position, with your hands directly under your shoulders. “The most important thing about plank pose is to engage your abs and tuck your tailbone,” says Inveen. Imagine your body in one long, strong line from the top of your head to your heels. Hold the pose for 30 to 60 seconds. You can also do Plank pose with your forearms on the ground.


Related: Yoga Exercises for Your Shoulders


11. Wide-Legged Forward Bend

Sports that require a lot of lateral movement, such as tennis, soccer and basketball, can lead to tight groin and inner thigh muscles. Wide-Legged Forward Bend targets both areas and also encourages shoulder opening. HOW TO DO IT: Begin by facing the long edge of your mat and step your feet three to four-and-a-half feet apart -- taller people may require a wider stance. Put your hands on your hips, contract your quadriceps muscles and begin to hinge forward from your hips, keeping your spine straight. Press into the outer edges of your feet. When you feel a stretch in your hamstrings and groin, bring your palms to the ground with your fingers pointing forward. To go deeper, walk your hands back between your feet and bend your elbows so that your forearms are perpendicular and your upper arms are parallel to the ground.


Related: 11 Yoga Poses to Detoxify Your Body


12. Constructive Rest Position

Athletes tend to be very focused on achieving a goal, whether hitting a homerun, making a tackle or setting a personal record. However, quality rest is just as important as training, and yoga therapist Daniel Hickman recommends that all athletes practice a constructive rest pose. HOW TO DO IT: Doing this pose is as simple as lying on your back with your knees bent, your feet hip-width apart and your knees angled in and resting against each other. Extend your arms out to the side at a comfortable distance from your torso. “This allows the whole line of the spine to relax, and gravity can do the work here,” says Hickman. “It’s more a posture of undoing.” Stay here for as long as you like -- even fall asleep, he says.


Related: 10 Yoga Moves to Remove Stress and Relax You at Bedtime


Time for Practice

Yoga poses are most effective if you do them regularly, but a full yoga practice can be difficult for many athletes to fit into their training schedules. Even if you only have 10 minutes a day, these poses will help improve your flexibility and performance and reduce your risk of injury. Yoga teacher Pamella Inveen stresses that it’s important for those new to yoga to take it slow and not push themselves into poses they’re not ready for. “Do what you can. It should feel like you’re getting a nice stretch,” she says. “Go about it comfortably.”


Related: 12 Amazing Paddleboard Yoga Poses (and How to Do Them)


Print or Pin This Article

What Do YOU Think?

Original article and pictures take www.livestrong.com site

вторник, 13 января 2009 г.

12 Barre Moves You Should Try Like Miss Louisiana 2016

12 Barre Moves You Should Try Like Miss Louisiana 2016
Miss LA barre Class
The Miss America state titleholders tried out a Gold Barre class at Equinox Sports Club Washington DC during orientation. Photo: Miss Louisiana

There are so many fitness methods out there that you can utilize to achieve your crown worthy body. With the recent trends in fitness classes, barre fitness has taken the cake for the most popular trend in the health world this year.


It looks like Miss Louisiana 2016, Justine Ker, loved her Gold Barre class that the Miss America class of 2017 took during orientation in Washington DC earlier this summer!


With so many different styles and methods to choose from, it can be super overwhelming. Trying some of the moves out at home is a great way to find out if this type of workout is right for you.


According to Fitness Magazine, barre-style workouts are a combination of Pilates, dance and yoga that will tone, stretch, and strengthen your entire body. Keep reading to find out a few moves that you can do at home for a barre style workout.


12 Barre Moves You Should Try


barre

A Personal Trainer can help you create the perfect balance between the gym and the studio to sculpt the perfect pageant body. Talk to one of ours today so you can get started on your crown worthy body ASAP.


Original article and pictures take ygidei-2v0qo9ojrpb5.cloudmaestro.com site

вторник, 6 января 2009 г.

11 Great Pinterest Charts for Fitness

11 Great Pinterest Charts for Fitness
Workout

In order to get into shape, you've gotta know what you're doing first. Getting a personal trainer is great, but it's expensive, and going to workout classes is fun, but they can eat up a lot of time. Luckily there are some free and time-saving options right at your fingertips: charts on Pinterest.


Yep, Pinterest isn't just for great DIY crafts. You can find a chart for any type of workout you could possibly imagine within the endless boards of the social network. It can be a little overwhelming to look through them at first, so we did you a favor and put together some of our favorites. Ready to get started?


Fitness Charts
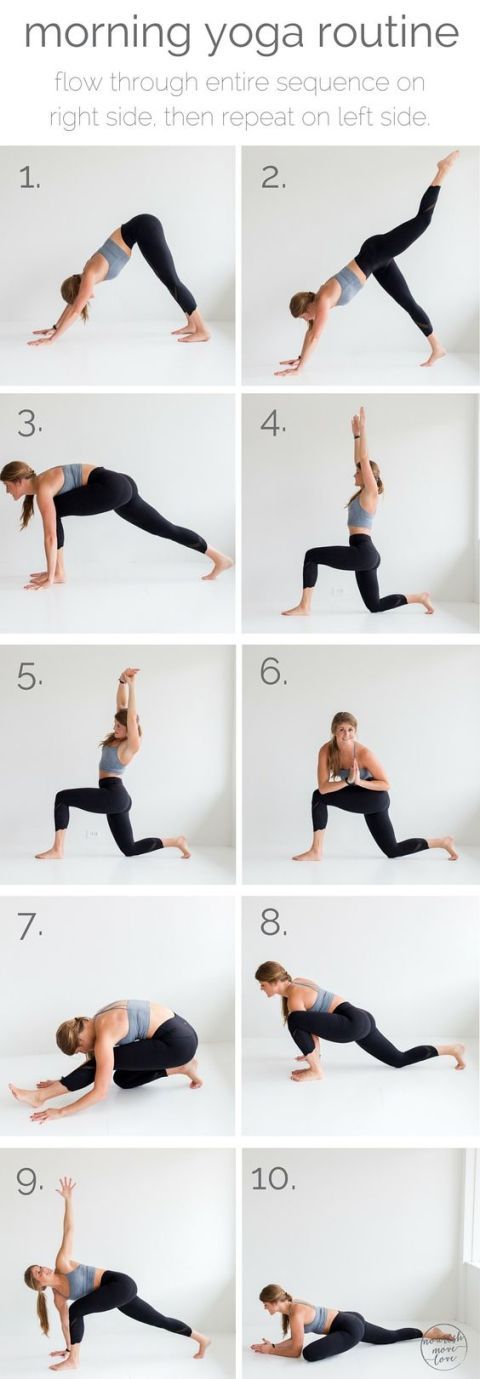
nourish move love

Fitness Charts
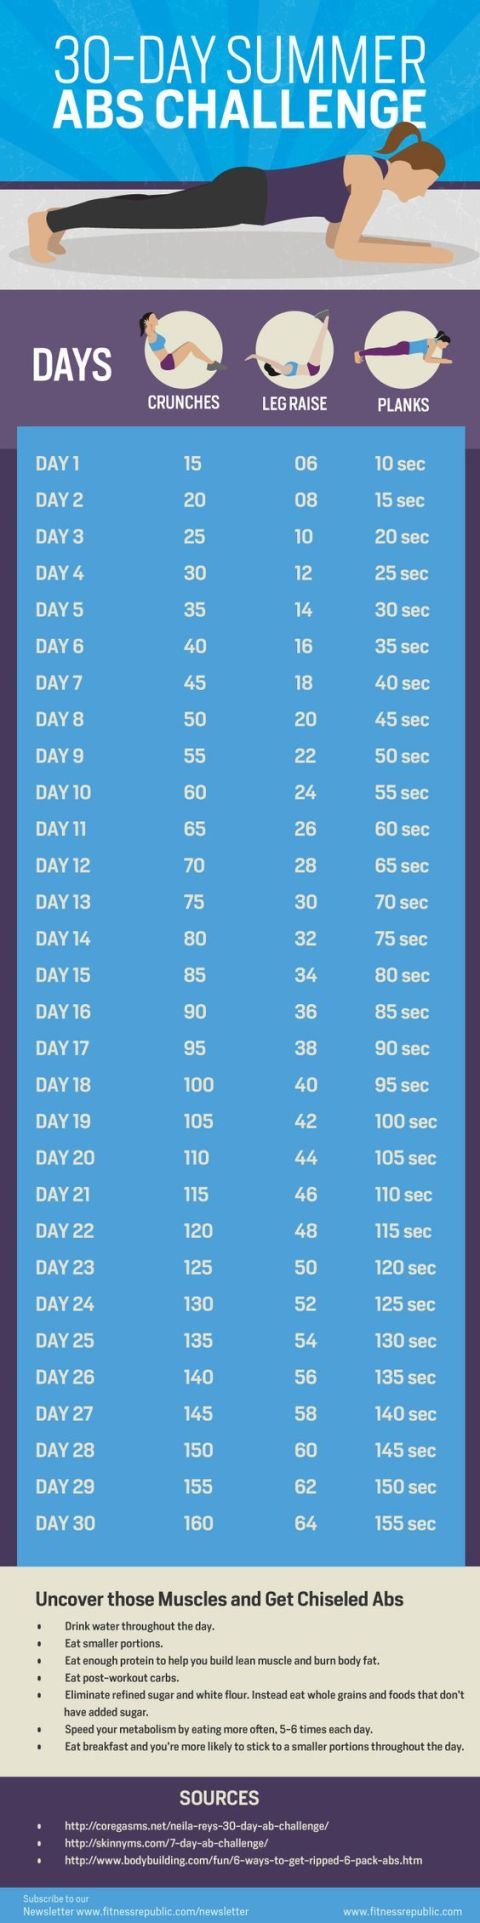
Fitness Republic

Fitness Charts
Lloyds Pharmacy

Original article and pictures take www.womansday.com site

пятница, 19 декабря 2008 г.

10 Yoga Poses to Speed Up Your Workout Recovery

10 Yoga Poses to Speed Up Your Workout Recovery

Feeling sore after a tough workout? It's important to give your body plenty of time to recover in between intense sweat sessions. Restorative yoga allows the nervous system to recharge and reset and has been scientifically proven to help lower cortisol levels, mitigating stress and the effect of situations that we feel are out of our control. And less stress equals a faster recovery and improved immune function, so you can keep up with your demand workout regimen. So here are 10 yoga poses you can do after every workout (or on your active recovery days) to help you maximize you time in the gym. (NOTE: Before you begin, you’ll need one bolster, at least two blankets and two blocks for these moves.)


Why Restorative Yoga Is Great for Athletes
WHY RESTORATIVE YOGA IS GREAT FOR ATHLETES

Restorative yoga uses props to ensure that the body is able to deeply relax. Props, gravity and breathing do the work for you; there’s no trying or forcing. It’s an energizing shift from how today’s world operates -- and everyone, especially athletes, needs balance. “Athletes who are coming to practice realize the value of resting the body as an important component of their training regimen,” says Lauren Eckstrom, an experienced restorative yoga teacher in Venice, Calif. “What keeps them coming back is how good they feel. They become more attuned to their bodies. They’re sleeping soundly, there are improvements in digestion, insomnia, athletic performance.” Practicing restorative poses at least once a week is a proactive step in preventing overuse injuries, burnout and fatigue.


Related: The One Thing Your Yoga Practice Might Be Missing


1. Legs-Up-the-Wall Pose (Viparita Karani)

This pose literally means “reverse action.” It helps drain the lymphatic system to carry toxins to the liver and kidneys for excretion, reverses blood flow and can mentally help flip your perspective of stressful issues. HOW TO DO IT: Place a bolster or blanket under your hips. Take a seat with your sit bones as close to the wall as comfortable, lie back with your arms relaxed and out to the side and send your legs up the wall. The more flexible you are through your lower body, the more comfortable you’ll feel closer to the wall. If you’d like, you can place a strap around your thighs for support. Breathe and let go as you relax for five to 10 minutes.


2. Reclining Bound Angle Pose (Supta Baddha Konasana)

Sinking into this pose is like taking a mini vacation. The external rotation of the hips and support of the upper back to help open the chest and externally rotate the shoulders compensate for the tasks we do each day like driving and sitting at a computer desk. Supporting the knees with blocks allows the inner thighs to open and receive a loving stretch without adding any strain or discomfort. HOW TO DO IT: Lie on a bolster with your sit bones on the floor and a blanket under your head for support. Bring the soles of your feet together and place a block under each knee. Relax your arms out the sides and melt into this pose for five to 10 minutes.


Related: 11 Yoga Poses to Eliminate Stress From Your Day


3. Supported Supine Twist (Supta Jaṭhara Parivartanasana)

Twists are an excellent way to cleanse the entire body -- the inner organs, nerves and muscles. They are fantastic for the digestive system, because they can aid in elimination and revitalize your body and mind. HOW TO DO IT: Fold a blanket to support your head, have your bolster and/or blanket to the side. Lie down with arms out to the sides, palms facing up. Bring your left knee in toward your chest, extend your right leg, look to the left or straight up, keep your shoulders on the floor and roll the left hip over to the right. Rest your left knee on the support, breathe and relax for five to 10 minutes on each side.


Related: 11 Yoga Poses to Detoxify Your Body


4. Supported Bridge Pose (Setu Bandha Sarvangasana)

Our hip flexors can get tight due from movements like squatting, running and biking, not to mention daily tasks like sitting and driving. Then, the pelvis rotates forward, which elongates the hamstrings and gluteus maximus beyond their ideal length. This makes the hamstrings and glutes weak. Release the tension and restore your body back to a more balanced state with this pose. HOW TO DO IT: Lie on your back, bend your knees, press your feet into the floor and engage your glutes to lift your hips. Place a block under the bony back part of your pelvis. Relax on top of the block with arms at your sides and breathe for two to five minutes.


5. Supported Forward Fold (Paschimottanasana)

This pose allows you to lengthen the hamstrings, release the lower back and lengthen the spine, counteracting compression. Forward folds are known to help alleviate nervous tension, provide relief from headaches and aid in balance of the hormonal system. HOW TO DO IT: Sit on the floor with legs together and outstretched. Place a bolster on top of your thighs. You can also place a folded blanket under your sit bones for support. Fold forward at the hips (not the waist). Let your arms reach for your toes or rest beside you. Rest the crown of your head on the bolster or turn your cheek to one side. Relax into the pose for five to 10 minutes.


Related: 5 Stretches for Tight Hamstrings


6. Supported Wide-Angle Seated Forward Fold (Upavistha Konasana)

This is a deep inner-thigh stretch. Plus, opening up these centers of the body may help alleviate low-back or abdominal pain as well as feelings of irritation or anger. HOW TO DO IT: Sit on the mat with your legs spread wide (about 90 degrees, depending on your flexibility). You can sit on a folded blanket under your sit bones to support your lower back if necessary. Place a bolster in front of you with blankets on top to adjust to your level of flexibility. Hinge forward at the hips. Relax your chest onto the bolster and turn your head to one side. Stay here for five to 10 minutes.


Related: 10 Yoga Moves to Remove Stress and Relax You at Bedtime


7. Supported Child’s Pose (Salamba Balasana)

Performing this pose can feel like escaping to a secret hideaway that pampers the body and nurtures the soul. Child’s pose eases the nervous system, allows you to relax the front side of the body, breathe into the back body and rest your head, delivering a sense of calm. HOW TO DO IT: Place your bolster on your yoga mat. Fold blankets and stack on top of the bolster if needed. Place your knees to the sides of the bolster. Sit your hips back toward your heels. Lengthen the sternum and fold forward over the bolsters, placing your arms at the sides and resting your cheek on the bolster. Breathe into your back body and relax deeply for as long as you’d like.


Related: 5 Restorative Yoga Poses for Restful Sleep


8. Reclining Hero Pose (Supta Virasana)

Reclining hero pose is an excellent pose to open up the chest, shoulders and upper back and lengthen the abdomen, hip flexors and quadriceps. Be mindful, though: The reclining version in particular can be too advanced if you have knee issues. HOW TO DO IT: Place your bolster on your mat. Kneel in front of your bolster with your shins hugged in close to the midline of your body, buttocks completely on the floor. Lower your back toward the bolster, placing your elbows on the floor and lying back. Draw your front ribs in and lift your pubis toward your navel to create length in your lower back. Breathe as you sink deeply into the pose for two to five minutes.


9. Supported Half Pigeon Pose (Eka Pada Rajakapotasana)

Hip mobility not only feels good, but it may be the key to being free from knee and low-back pain. According to a 2011 study in the Journal of Manual and Manipulative Therapy, about 63 percent of subjects reported improvements in chronic low-back pain after performing hip-mobility exercises. HOW TO DO IT: Place your bolster beneath you while in downward dog. Lunge your right foot in between your hands. Drop the left knee to the floor. Slide your left leg way back. Walk your right foot to your left hand and drop your right knee to the floor. Rest your torso on your bolster with your head turned to one side and your arms resting at your sides. Breathe deeply and remain in the pose for five to 10 minutes before switching sides.


Related: 9 Moves You Can Do Every Day for Better Joint Mobility


10. Supported Corpse Pose (Savasana)

What Do YOU Think?

Original article and pictures take www.livestrong.com site

понедельник, 15 декабря 2008 г.

10 Things You're Not Doing at the Gym (But Should Be)

10 Things You're Not Doing at the Gym (But Should Be)

Get the most out of your gym membership with these expert tips


You Don't Use the "Heavy" Weights


1 of 10


All photos


It can be intimidating to venture out onto the weight room floor, especially when it's full of bodybuilding types throwing weights around. But you aren't doing yourself any favors by staying in the corner with those little pink dumbbells!


"You have two types of muscle fibers: slow and fast. If you don't use heavier weights, you neglect an entire set of muscle fibers, namely the fast fibers, which are important for moving quickly, lifting weighty objects (your heavy purse, grocery bag, suitcase), and for spine and hip stability," says Michele Olson, Ph.D., professor of exercise science at Auburn University Montgomery and creator of the Perfect Legs, Glutes & Abs DVD.


And if you're worried that you'll bulk up, don't be. "Women cannot add much size to their muscles to begin with since we have low concentrations of the male hormone testosterone, which is necessary to enlarge muscle to any noticeable degree," Olson says.


You Don't Use Your Upper Body Enough During Cardio Sessions


2 of 10


All photos


Does your typical cardio session always involve the treadmill, stationary bike, or stair stepper? You may not be burning as many calories as you could be, Olson says. "Using your upper-body muscles more can up your total calorie count and will help you develop better endurance. Athletes with the fittest cardiovascular systems are total-body, aerobic athletes such as cross country skiers and swimmers (movements which use both the arms and the legs)."


Olson recommends using machines with an upper body component, like a total-body elliptical machine, and alternating intervals focusing on your upper and lower body. For example, try pumping the handles more aggressively with your arms for 2 minutes, and then focus on moving with your legs for the next 3 minutes. Or mix things up by using an upper-body arm bike (or try a Krankcycling class) that forces you to raise your heart rate using only your upper half—it's tougher than it sounds!


You Don't Have a Plan


3 of 10


All photos


Do you want to lose 10 pounds, run a 5K, or become more flexible? "There are special workout plans for each of the above, and they are not interchangeable—there is no "one exercise-fits-all" program," Olson says. "If you do not have a plan to address your greatest fitness needs and desires, you can stall results and actually create changes you do not need or that might not even be appropriate for you."


Your primary objective (weight loss, endurance, strength) should influence the volume (amount you do), intensity (how light or hard/heavy) and the mode (cardio, resistance exercises, stretching programs) of every workout, which is why Olson says it's so important to take the time to meet with a qualified trainer at your gym for an assessment and to help create your goal-specific program.


You Don't Push Yourself Enough


4 of 10


All photos


You may have just spent 2 hours at the gym, but how much of that time were you intensely exercising? Yes, fitness should be fun, but if your set routine involves reading a magazine on a card machine followed by the same weight machine circuit, chances are you aren't seeing the results you want.


"In the beginning exercise can feel unruly and even excruciating—which is clearly not fun—but once your body learns how to do various exercise movements and your strength and stamina improve, it's time to upgrade your program," Olson says. "Time and again research has shown that increasing to more vigorous levels of activity bring about greater health benefits and noticeably improved fitness and appearance."


And you don't have to spend more time at the gym. In fact, if you focus on the quality of your workout, you may actually spend less time there. "This is why interval training has become so popular," Olsen says. Experts recommend a range of intensity levels, but many interval workouts go up to 85 percent or your max heart rate. "If you can learn to push yourself appropriately, you can also land the benefit of a higher metabolism following exercise—that means you are rewarded for your extra effort following exercise with an extra energy burn!"


You Don't Take Advantage of the Experts Who Work There


5 of 10


All photos


"If your club has trainers, movement specialists, physical therapists, nutritionists, or registered dietitians, use them!" Olson says. "They are skilled to determine some needs you may have that are not obvious but could prevent you from making progress or possibly causing you injury."


This is especially important if your goal is weight loss. If you're trying to lose weight, what you eat is incredibly important, especially if you're regularly exercising.


"A trained expert can speed up your progress and results as well as prevent you from burning out, under-eating, or over-doing," Olsen says.


You Don't Do Eccentric Exercises


6 of 10


All photos


We like to work the muscles we can see in the mirror (like our abs), but we can't ignore our backsides, especially the muscles around our spine, Olson says. For example, we tend to crunch, curl, and shorten our abs, but it's also important to try some eccentric movements to help balance out the strength of those muscles during "lengthening" movements.


Try this eccentric move during your next workout to help balance out your body:


Rotating Super Girl:This move uses a 'sit-up' board (or bench) adjusted on a decline. Start sitting on the bench and hook your legs under the pads to hold them in place. Keeping your abs drawn in tight and your spine straight, hinge back away from your legs until your body is making a 'V' shape. Bring both arms up and bend your elbows, turning your palms in as if you were holding a giant ball above your head. Slowly rotate your torso to the right (as shown), then back to the center, and to the left (counting each rotation as one rep). Work your way up to three full sets of 15 reps to target your abs in a whole new way.


You Don't "Pound" Enough


7 of 10


All photos


You already know that it's important to do weight-bearing exercise to help protect your bones, but you may not realize just how much loading you need to do in order to reap the bone density benefits. "While treadmill walking is sufficient to keep the spinal bones strong, your hip bones need more loading," Olson says. "To do this, think "steep," or "stomp." If you want to stick to walking, increase the incline on the treadmill to seven percent for 3 minutes, followed by 5 minutes on level ground, alternating five times during a 40-minute workout.


Other options: Take a step class, use that machine with the revolving stairs, or walk the stairs in your gym. This extra impact is not too heavy but at a level that is much more effective at getting your hip bones to take up more calcium and become more dense.


You Don't Do Unilateral Training


8 of 10


All photos


Every time you use a leg press, leg curl, or leg extension machine at the gym, you work both legs together at same the time. The problem? This could be causing some muscular imbalances in your body, according to Olson.


"Most of us do not have equal muscle fitness on our right versus left leg, and when you exercise both legs together, the stronger one tends to naturally do a bit more of the work," she says. Try using less weight and doing a full set on your weaker (usually the left) side first. Then, switch legs and do a full set with your stronger side.


"It's a real eye-opener—try it! Training like this will also go far to help you balance the strength between the right and left sides of you body," Olson says.


You Leave Without Stretching


9 of 10


All photos


Skipping a post-workout stretch is the most common mistake exercisers make, Olson says. After, not before, your workout is the perfect time to stretch, as your muscles are warm and flowing with oxygen-rich blood.


All adults should be stretching at least three times a week, Olson says. Stretch the front side of your body first, since tighter muscles on the front of the body can reduce flexibility in the back of your body. For example, if your hip flexors are tight, your hamstrings will have limited flexibility.


Short on time? Even doing just two stretches before you head out the door can make a big difference. Here are some of Olsen's favorites:


Heel to Glute Stretch (top image): Lie facedown on a mat or towel with your legs extended out behind you. Reach your right arm out in front of your shoulder, palm pressed into the floor. Bend your left knee and grab a hold of your left foot with your left hand, gently pulling your heel in towards your body. Hold for 30 to 60 seconds and then switch legs. If you have time, repeat up to three times total with each leg.


Prone Abs Stretch (bottom image):Lie facedown with your legs extended out behind you, bend your elbows in underneath your shoulders and lift your chest off the floor, propping your body up with your forearms (palms should face the floor). Let your lower body relax and try to keep your hips on the ground as you extend your spine and stretch the front of your body. Hold for 30-60 seconds and then release. If you have time, repeat up to three times total.


You Don't Change Direction


10 of 10


All photos


Changing your direction is another great way to mix up your cardio workouts for better results. If you always move forward on the treadmill, elliptical, or bike, try moving sideways and backwards too, Olson says.


"We are so used to moving forward in one plane of motion, but research on treadmill exercise has shown that you can burn more calories and activate lesser-used muscles such as your outer hip muscles, shins, and hamstrings if you turn your walk or jog sideways and backwards."


Try this routine: Walk or jog for 3 minutes forward, and then turn to the side and do a side shuffle for 30 seconds with your right leg leading, and then turn around and lead with your left leg for 30 seconds. Return to your forward stride for 3 more minutes, and then try walking backwards for 30 seconds. For safety, be sure to slow your speed and/or use the handrails as you adjust to moving in new directions.


"Since your body is not used to this (even though it is designed to move in all three directions), it will pump your heart rate up higher and cause you to burn extra calories." You can also do this on the elliptical or stationary bike. Use the interval routine above but simply pedal backwards for the 30-second intervals.


Original article and pictures take www.shape.com site